Easter is just around the corner, so I thought I would share, How to make a Layered Easter Card. Since I’m on the Fantabulous Circut Challenge Blog I’ve even thrown in a Cricut Cut too.


Make a project about Easter.
And the prize is-
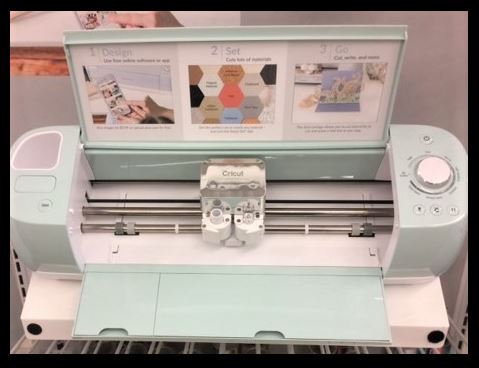
When I first got my Cricut I wasn’t sure how to use the device. I would have lots of trial and error trying to figure out how to cut using those dials and the keypad on the machine. Now that I have a newer machine the Cricut Explore Air I love using it almost daily.
Items used in How to make a Layered Easter Card
Calico Collage Victorian Easter Digital Download – FREE
Cricut Explore Air Premium Bundle
Gypsy Font Cartridge – Egg Flourish
Brutus Monroe Easter Blessings (this is a stamp club set)
Brutus Monroe Detail Ink – Raven, Aubergine
Circle punch, 1 inch, 1.25 inch, 1.50 inch (here is a Nesting Circle set for many sizes I found on Amazon)
Ranger Blending tool
CUTTLEBUG 5X7 EMBOSS-OXFORD Embossing Folder
Darice Embossing Folder, 4.25 by 5.75-Inch, Brick Wall
3D Pop Dots Square Dual-Adhesive Foam Mount
PURPLE 1mm Bugtail Satin Cord Shamballa Macrame Beading Nylon Kumihimo String (210ft Spool)
Stamp Block Set
Stick On Pearls
A2 Greeting card
White cardstock cut just shy of 4.25 in. x 5.50 in., Mat for Rabbit image
Aleene’s Tacky Glue
Tattered Angels Glimmer Mist – Pearl
Now that I have Cricut Design Space it allows me the ability to customize images to my needs. For today’s project, I pulled the Egg Flourish from the Gypsy Font cartridge into Design Space.
Once I had the image in Design space I then spent a few minutes removing the Egg as I didn’t want that part of the cut I wanted the mat. I then sized the cut to fit on a A2 greeting card and cut on two different shades of purple cardstock.
Using my Vagabond I made a sandwich with the Darice Embossing Folder, 4.25 by 5.75-Inch, Brick Wall and the light purple cardstock. I also made a sandwich with the CUTTLEBUG 5X7 EMBOSS-OXFORD Embossing Folder and white cardstock.
On both of the newly textured papers I used the Ranger blending tool and Brutus Monroe Aubergine ink to bring out the texture.
Tattered Angels Glimmer Mist – Pearl was sprayed over both of the textured pieces. Set aside to dry. (Tip store your Glimmer Mist on it’s side and then it is easier to shake the glimmer into the liquid)
Print the Calico Collage Victorian Easter Digital Download – FREE and cut out the large rabbit image, mat with white cardstock. Next layer on the purple mat.
Stamp the Brutus Monroe Easter Blessings on a scrap of white cardstock and punch with one inch punch. Punch a 1.25 of purple to mat.
Select the round bunny image from the Calico Collage Victorian Easter Digital Download – FREE, punch a purple mat using the 1.5 punch.
Use Aleene’s Tacky Glue to adhere the purple mat with the large bunny image to the White basket weave card topper.
Wrap PURPLE 1mm Bugtail Satin Cord Shamballa Macrame Beading Nylon Kumihimo String (210ft Spool) around the lower portion of the card. Adhere to A2 card.
Adhere Circle Bunny and Easter Blessings using Pop Dots. Add a bow and place the Stick On Pearls around the edge of the purple mat.

Enjoy the card!
Here is a video showing How to make a Layered Easter Card
Come along and join in the fun on the Fantabulous Circut Challenge Blog since now you know How to make a Layered Easter Card. You could win the prize! Just enter a project that the theme is Easter and uses at least one Cricut cut image. That’s it! Super simple!
Thanks for stopping by the blog today.
Be sure to follow me on my Facebook Page to see updates about projects, where I am teaching and more.