Sharing a Journal Tote Tutorial as I’m going on vacation and I wanted a small tote to hold a journal and a few tools and supplies. Using a fat quarter of fabric, scraps, ribbon and my sewing machine I created a tote. This took me about 45 minutes to create.
Today is my birthday and I made this tote to take with me on a cruise.

Journal Tote Tutorial Video
Supplies Used for the Journal Tote Tutorial
- Fat Quarter of Batik Fabric One:18.5 inches x 14 inches, second is about 14 wide by 10 tall.
- Scrap of canvas 18.5 inches x 14 inches
- Fancy Trim from Dust Fairies
- Strips of dyed fabric
- Ribbon
- Fiskars Scissors
- Ruler
- Pins
- Sewing Machine
For this Journal Tote Tutorial I didn’t use a pattern. Since I have years of sewing experience of making all kinds of things I decided I would just start laying things out and see how it comes together. If you are new to sewing, you might pick up a pattern so that you can follow the steps.
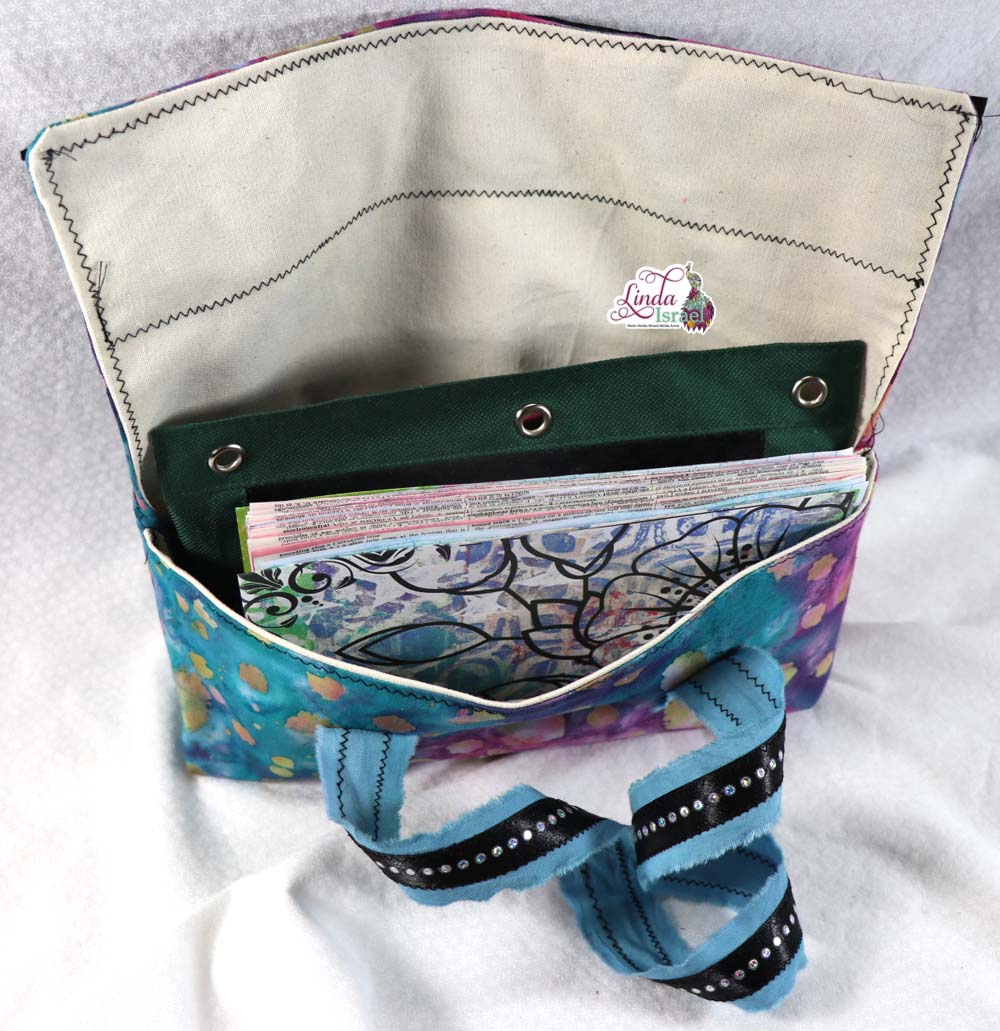
I started with a fat quarter (this is a quarter of a yard of fabric but the cut it so that you get a larger piece than just a strip of fabric selvage to selvage) and a scrap of canvas. The fabric was wrapped around my journal and my bag of tools to see if I had enough.
Once I determined the size based on what I wanted to put into the tote I began sewing things together. First I sewed a hem on the top edge of the pocket for the inside. Then pinned the pocket to the inside of the bag, the lining.
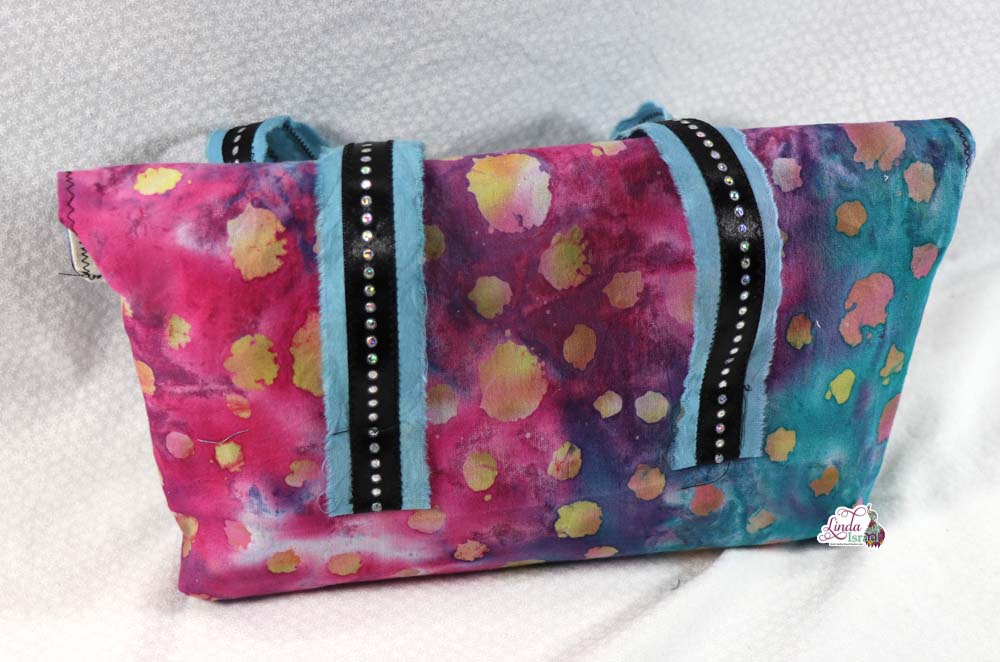
A one inch wide strip of fabric was used for the handle, but I wanted it to have a little more body and to pull the black from the embroidered piece from the front I used ribbon. Sewing the ribbon on top of the fabric made it have more body and gave a pretty accent.
The handles were then sewn onto the outside piece of the bag. Using a ruler to space how far apart and how high up from the bottom of the tote helped.
Sew the tote together by putting the outside and inside pieces of fabric face to face. Sew a quarter inch seam around the outside edge, leaving a four inch gap on what will become the flap. Clip the corners and then turn the bag right side out.
Pin the decoration to the flap area and make sure to pin the opening when the bag was turned closed. Sew the decoration down on the flap and sew the top edge to the bag.
Fold the bag, lining up where the handles go and sew right sides together down the both sides. Sewing the bag together like this helps with the raw edges and isn’t very complicated.
With the bag still inside out, lay the bag flat and then cut a one inch square out of the lower two corners. This new hole will be sewn and will make our bag have a gusset to hold all our goodies. Pinch the new hole so that the cut lines meet and sew.
Turn the bag right side out and admire what you created! It is so easy to create and you can be as simple or as fancy as you want. Use scraps around the house to create your own unique Journal Tote using this Journal Tote Tutorial.
Now I’m off on vacation. See you when I return!
Interested in any of the projects Linda has created? Please feel free to contact her through her website. Here is her shop, a lot of items featured and more added weekly.
Keep updated on her posts by following the blog by creating an account. Follow Linda on her Facebook Page or on Instagram for updates that may not be shared on the blog.
Thanks so much for stopping by the blog today to see the Journal Tote Tutorial.