As requested I’m sharing a Gel Print and Stamped Christmas Journal Page Tutorial. When I showed journal pages I made for the Oct 25th Merry Lil Christmas creative box journal it was requested that I make a tutorial. Therefore, here is the requested tutorial.
Gel Print and Stamped Christmas Journal Page Tutorial Video
Supplies used for the Gel Print and Stamped Christmas Journal Page Tutorial.
- Book Pages
- Merry Lil Christmas Tattered Angels Glimmer Mist Paint kit
- Heat Tool
- Merry Lil Christmas Creative Kit
- Gel Prints from Buffalo Gel Print Tutorial
- Aleene’s Tacky Glue
- Fabric Strip from Merry Lil Christmas Creative kit
- Sewing Machine
- Best Glue Ever with Large No Clog Writing Tip
- Diamond Bar Stamp
- Archival Ink, Jet Black
- Distress Ink, Walnut Stain
- Blending Tool
- White Watercolor Or Linen Cardstock
- Gnome 1 Stamp
- Poinsettia Stamp
- Spectrum Noir Sparkle Pens (these were the closest color on Amazon)
- Inktense Ink Derwent Colored Pencils
- Derwent Academy Watercolor Pencils
- Fiskars Easy Touch Scissors
- Holly Leaf Stamp
- Scrap of White Cardstock (there are full sheets inside the creative kit)
- Merry Christmas QT
- Versamark Watermark Ink Pad
- Gold Glitter Embossing Powder
- Corner Chomper
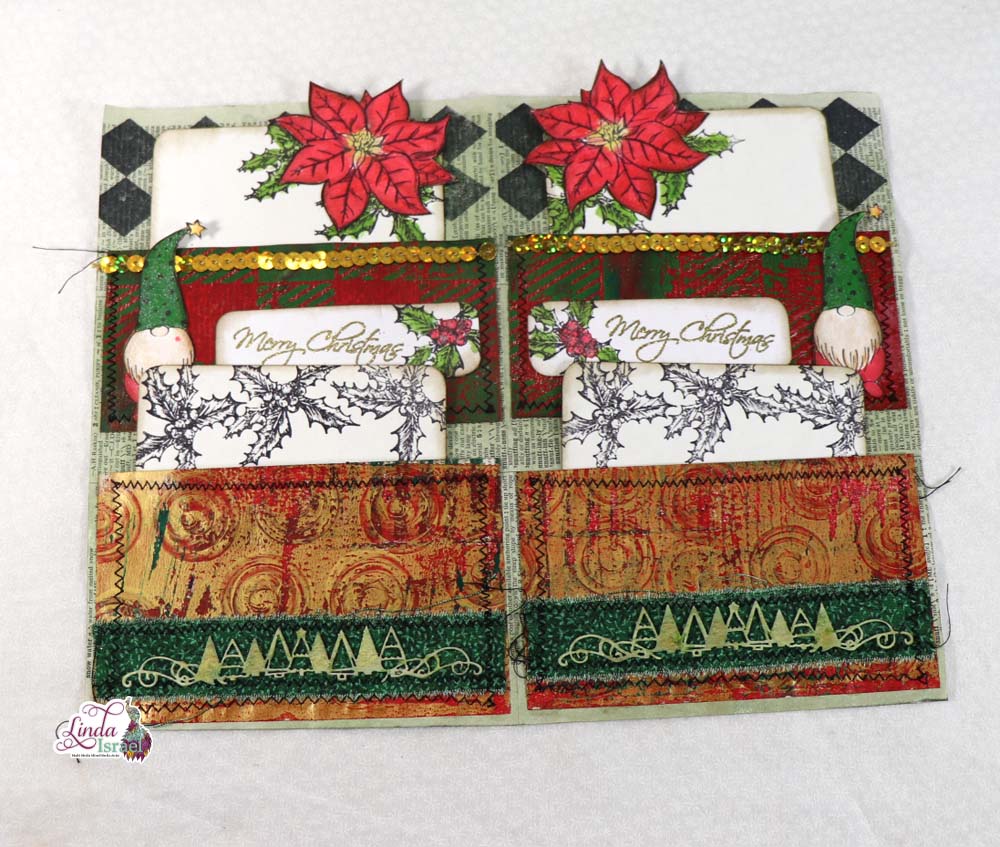
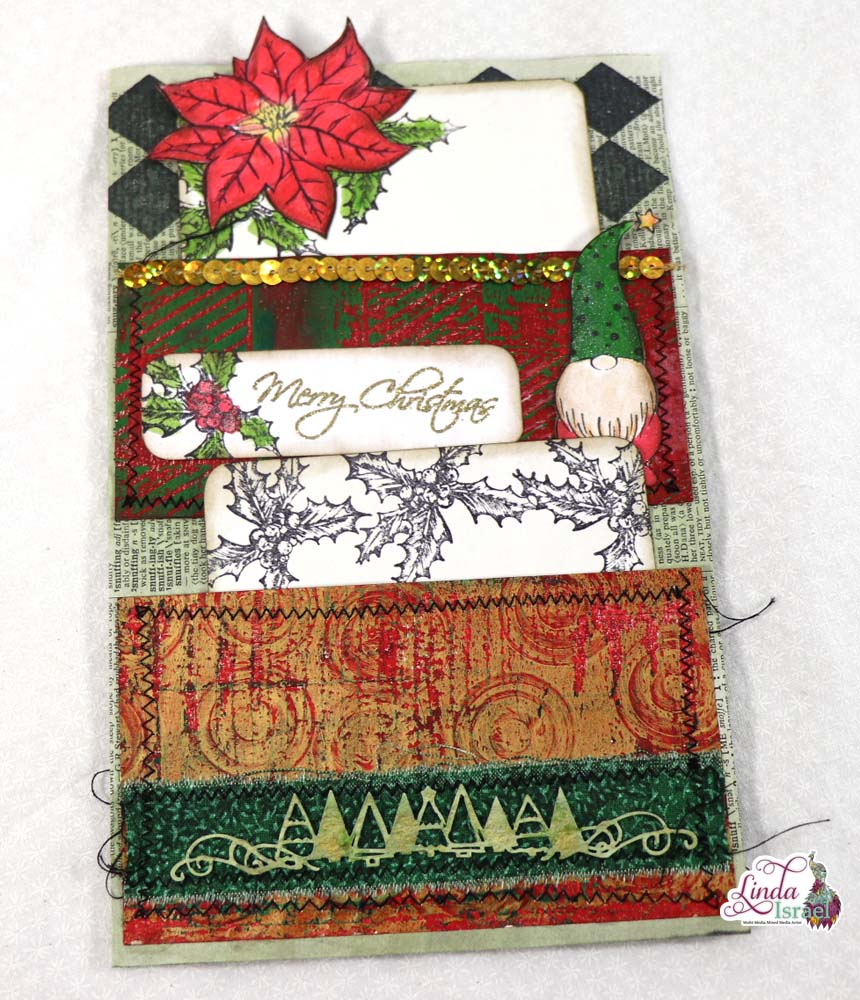
To get started with this Gel Print and Stamped Christmas Journal Page Tutorial I chose a dictionary page as the base. This page was trimmed down to be 11 x 8.5 inches, you can make a journal page any size you like. Just adjust to fit your page.
Spray the page with Holly TAGM from the Merry Lil Christmas Paint kit all over the page. Allow this to dry or use a heat tool to speed up the drying time. Since I had the sprays out I decided to spray with MLC Pine TAGM the tree chipboard boarder from the Merry Lil Christmas Creative kit. Allow the chipboard to dry.
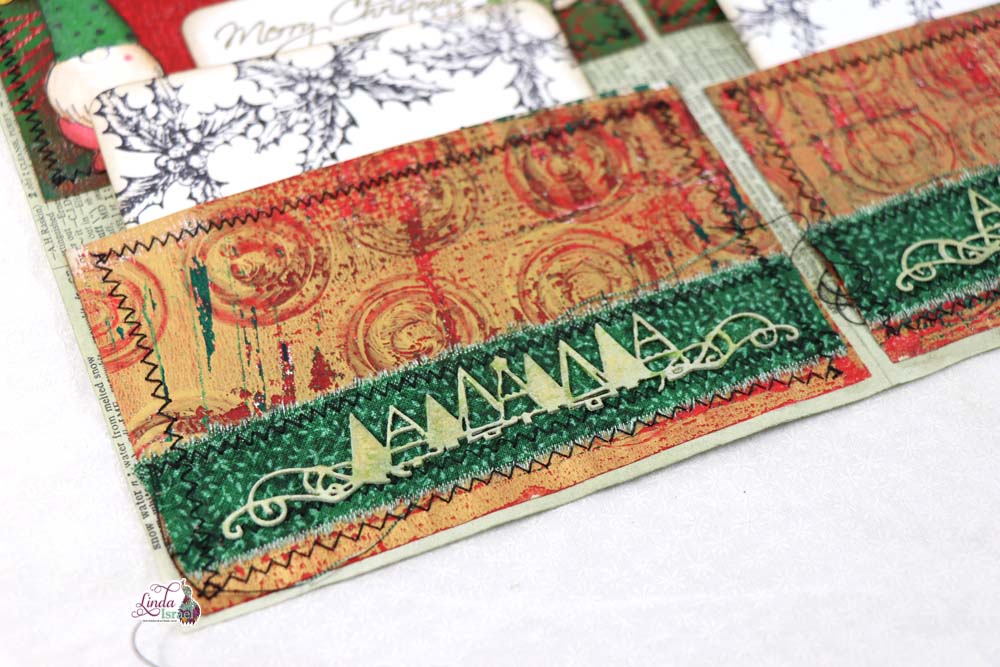
For the pockets on the page I used gel prints that were made during the Buffalo Plaid Gel Print Tutorial. The top pockets measure about 2.5 x 5.25 inches. Adding another book page to the backside makes this paper stronger since the gel print was on a book page. The bottom pockets measure about 3 x 5.25 inches. Since this gel print was on a book page and there was extra page I just folded over the top to give a sturdy edge. Book pages glued to the back are another option to strengthen the pocket.
Apply distress ink, walnut stain around the edges of the pockets.
On the bottom page a one inch by 5.25 inch strip of fabric was glued down. Using a sewing machine a zig zag stich was added to hold the fabric and to give a decorative touch.
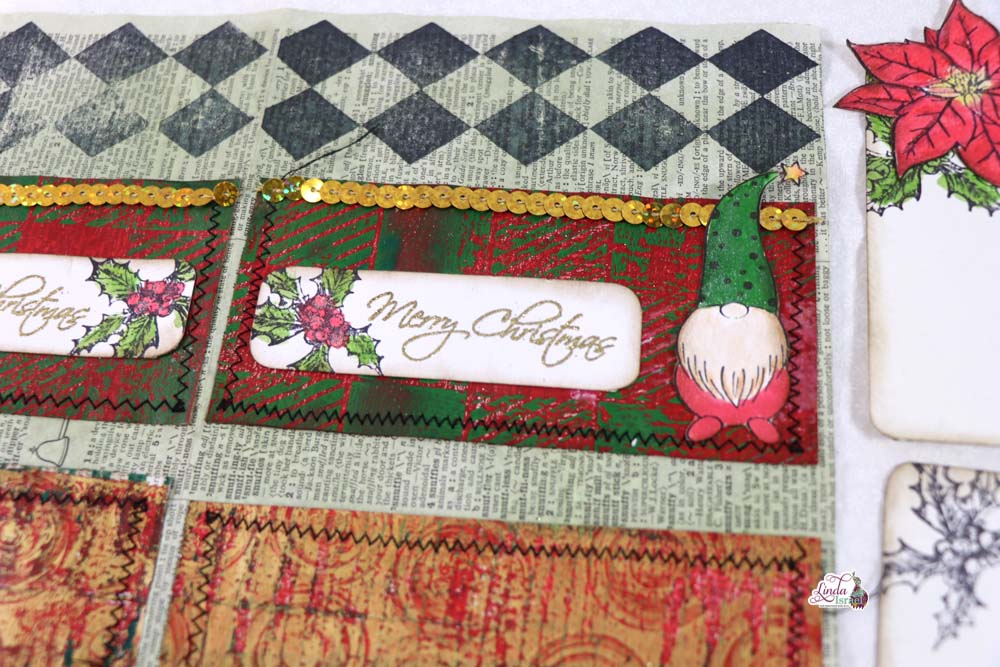
To adhere the sequin trim use the Best Glue Ever. Make a small line across the top of the plaid pockets and allow the glue to air dry. Once the glue is dry press the sequin trim into the glue.
Add the tree chipboard on top of the fabric strip with Aleene’s Tacky Glue.
Grab the book page we painted and the Diamond Bar stamp. Ink with Archival Ink, Jet Black and stamp across the top of the page.
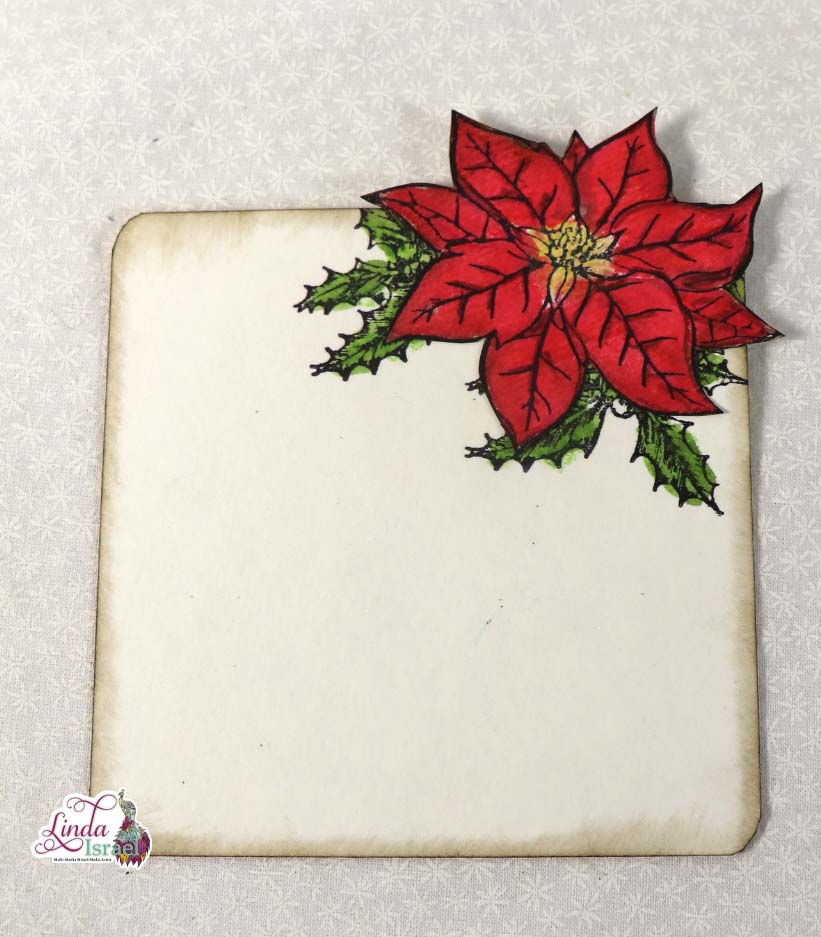
Stamp the Gnome 1 and Poinsettia stamps on white cardstock with Archival Ink, Jet Black. Then color the images using Spectrum Noir Sparkle Pens and Derwent watercolor/Inktense pencils. Water color the images using different colors from the Merry Lil Christmas TAGM paint kit. Fussy cut the images using Fiskars scissors and apply distress ink walnut stain around the images.
Tip: If you have a hard time getting distress ink in the small areas around an image use a paint brush dipped in water and then on the distress ink pad.
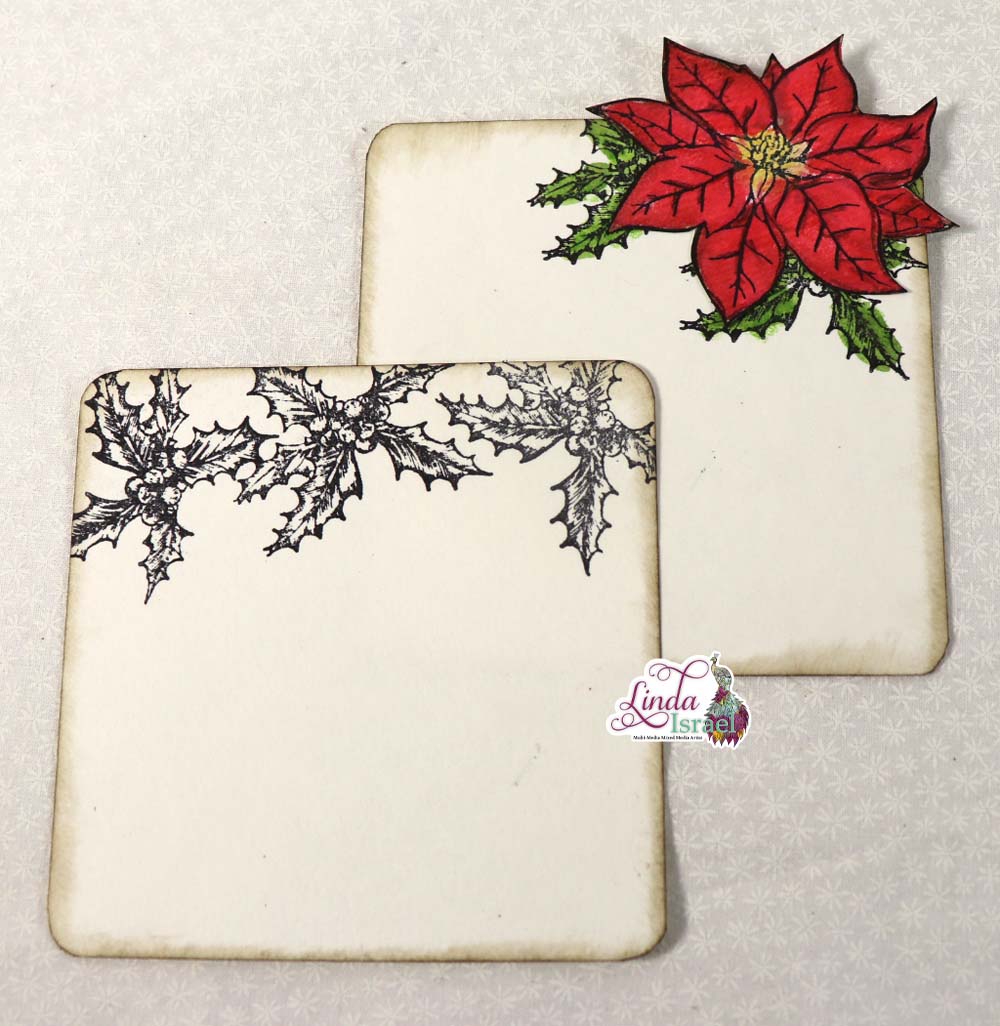
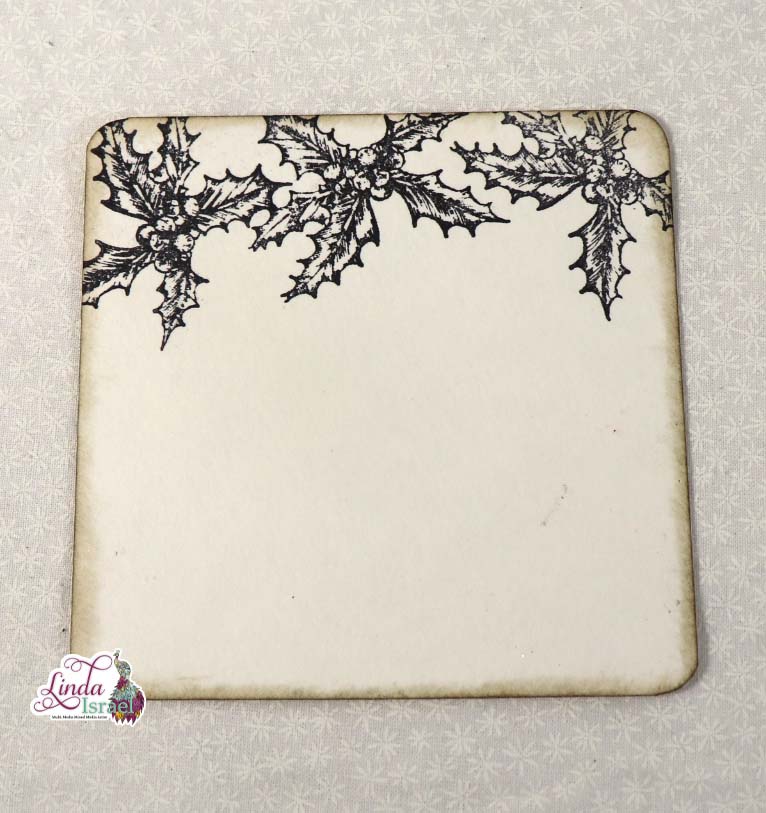
Four by four inch journal cards are perfect for these pockets. Stamp the Holly Leaf Stamp in the corners of two cards. Then stamp the Holly Leaf Stamp across the top of two more journal cards.
Color the Holly Leaf images that were stamped in the corners with Watercolor Pencils and Merry Lil Christmas TAGM.
Stamp Merry Christmas on a strip of white cardstock with Versamark watermark ink, then sprinkle gold glitter embossing powder over the stamped image. Heat the embossing powder until it is raised and no longer dull.
Stamp the Holly Leaf stamp on the Merry Christmas Strip. Trim the strip to 3.5 inches wide. color the Holly Leaf images. Round the corners using the Corner Chomper, then apply distress ink around the eges.
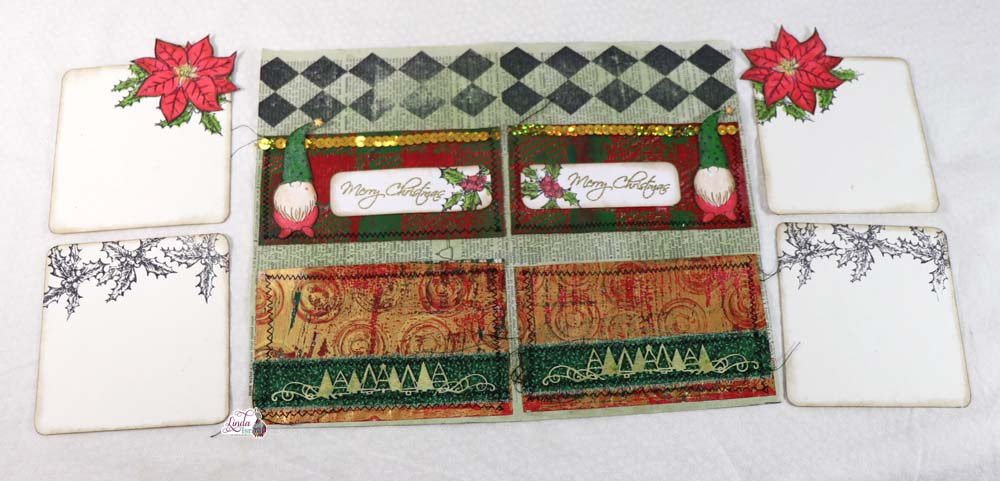
Now that all the elements have been created it is time to adhere to the base page. Using Aleene’s Tacky glue adhere the pockets to the page. Complete embellishing the pockets with the stamped elements. Add the journal cards to the pockets and enjoy the journal page!

Interested in any of the projects Linda has created? Please feel free to contact her through her website. Here is her shop, a lot of items featured and more added weekly.
Keep updated on her posts by following the blog by creating an account. Follow Linda on her Facebook Page or on Instagram for updates that may not be shared on the blog.
Thanks so much for stopping by the blog today to see the Gel Print and Stamped Christmas Journal Page Tutorial.